
This is an old revision of the document!
Table of Contents
Installing Slackware on the Raspberry Pi 4
| Platform | AArch64/ARM64 |
| Hardware Model | Raspberry Pi 4 model B |
| Document Version | 1.01, April 2022 |
| Author | Stuart Winter <mozes@slackware> |
| Contributors | Brenton Earl (R&D for the RPi4 Hardware Model) |
| Acknowledgements | Exaga (guidance with hardware/accessories) |
Video Tutorial
This tutorial is also available in video form.
Help / Support
Please post questions to the Slackware ARM forum.
Installation Lifecycle
The Installation consists of a number of distinct stages:
- Acquiring all required hardware
- Setup of the Raspberry Pi hardware
- Downloading the Slackware assets
- Verifying the Slackware assets
- Writing the Slackware Installer to the Micro SD card
- Writing the Slackware Installation Media to the USB flash drive
- Booting the Slackware Installer
- Installing Slackware
- Completing the installation
- Booting the Slackware OS
- Post installation configuration and tweaks
Caveats
Raspberry Pi 3 support
Using the GUI on the Raspberry Pi 3 is not recommended due to the lack of RAM - the screen will typically freeze. It is recommended that the Raspberry Pi 3 is used headless (remote access).
Requirements
Hardware
| Item | Specification/Type | Required? | Notes | |
|---|---|---|---|---|
| Raspberry Pi 4 Model B | 4GB and 8GB RAM models have been tested | Yes | This is the bare board | |
| 'Ice Tower' CPU heat sink & cooling fan | A heat sink or CPU is required | This has been recommended as a suitable fan for high-CPU workloads. | ||
| Power supply | Official Raspberry Pi PSU | Yes | It's best to use the official PSU as others can cause instability over time. | |
| Inline power switch | - | Optional but recommended | The Raspberry Pi 4 does not have reset nor power buttons on the board. Reports from the Slackware community suggest that the power socket on the Rpi will become damaged over time from wear. This inline power switch prevents damage to the RPi. | |
| Micro to full-size HDMI adapter | - | Optional | Depends on your local setup and whether you wish to connect an HDMI monitor to the RPi. | |
| Real Time Clock (RTC) | Adafruit PiRTC - Precise DS3231 | Optional | This RTC been recommended by the Slackware community. | |
| Battery for RTC | Lithium 3volt CR1220 | Optional | Depends on whether you use the RTC module. This enables the RTC to maintain the time whilst the RPi is powered down. | |
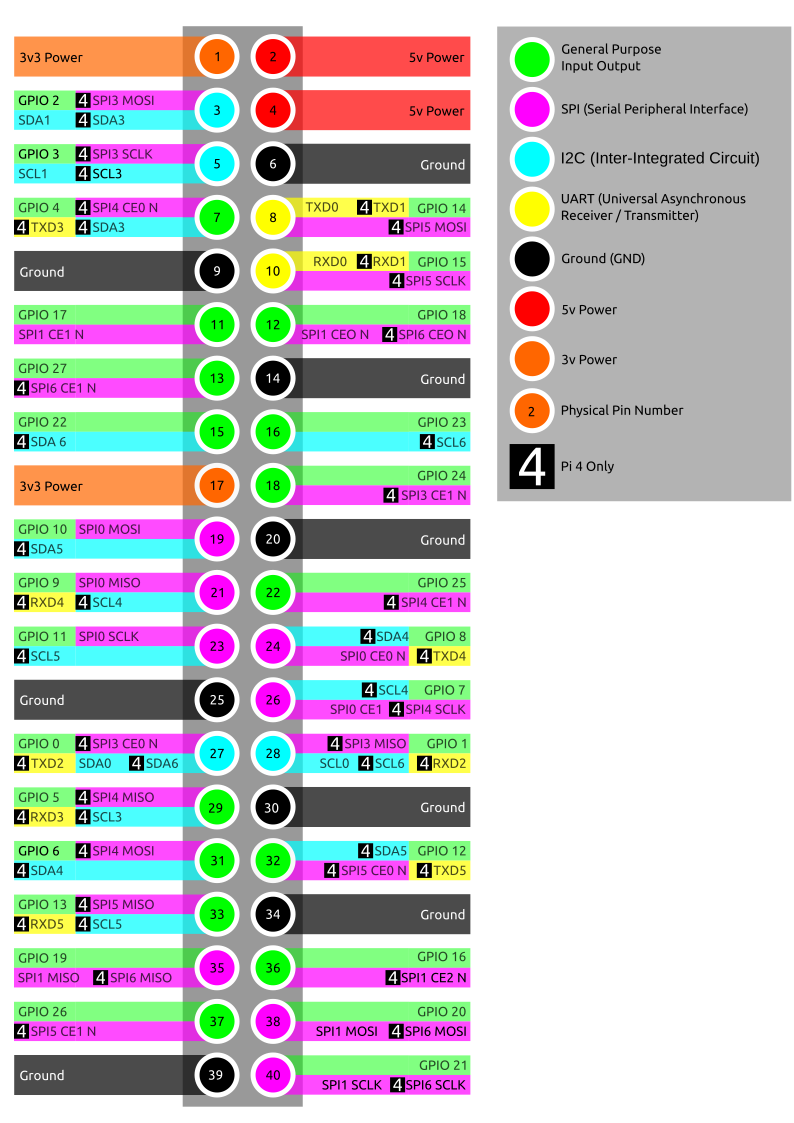
| Dupont wires | Female to male | Optional | This is to wire in the RTC module, as the large sized CPU heat sink prevents the RTC module from connecting directly to the GPIO. These wires are also useful for connecting other peripherals to the RPi's GPIO. | |
| SATA storage / SSD | Minimum useful size: 30GB | Required | Will contain the Operating System. You can install to other storage, but this documentation covers this particular configuration only. The Kingston-SA400S37-240G has thoroughly proved itself in the Slackware ARM build infrastructure - most build machines use these, but any SSD or spinning hard disk should work | |
| USB to SATA adapter | - | Required | Many models will work, but this one has been tested on many of this author's ARM hardware. | |
| USB to Serial adapter | PL2303 chip. Other models may work, but this one has been tested. If your model has the option to set voltages, ensure 3volts is set! | Optional | A USB to Serial/UART adapter is recommended if you want to access the console remotely, but is unnecessary if you only plan on using an HDMI monitor. This document covers installing using an HDMI monitor - you can find information about connecting the Serial/UART adapter at the foot of this document | |
| USB Flash Drive ('USB stick') | 8GB minimum capacity | Required | This will contain the Slackware Installation Media for use during the installation phase only. | |
| Micro SD Card | 8GB minimum capacity, Class 10 (fast speed) | Required | Initially used to boot the Slackware Installer, and subsequently transformed into Slackware's /boot partition. | |
| USB keyboard and mouse | Standard peripherals | Required | A USB keyboard and mouse are required for this Slackware installation guide but are not required for the running of the OS. Slackware can also be installed headless (without a keyboard or monitor) over the Serial/UART or SSH (but this isn't documented). |
Recommended/ tested SD cards and other storage peripherals
In addition to the examples of tested hardware, here follows other storage devices and peripherals that have been tested by the Slackware community.
| Type | Details |
|---|---|
| Micro SD card | Gigastone 32GB |
| Micro SD card | Kingston 64GB microSDHC Canvas Select Plus |
| Micro SD card | Kingston SDCG3 |
| Micro SD card | SanDisk 16GB |
| USB to SATA adapter (alternative to the one in the table above) | SKL Tech |
Alternatives to SSD
If you prefer to use NVME storage, these have been tested:
| NVME Storage Module | Kingston A2000 SSD 250G & 500GB models |
| USB to NVME M.2 adapter & enclosure | LEMORELE M.2 NVMe SSD Enclosure USB C External PCIe B+M/M-Key SSD Caddy 10Gbp UASP USB 3.1 Gen 2 M2 |
Notes on storage setup
The setup documented here (2.5“ SSD connected to a USB-to-Serial adapter for power and data) has proven stable for this author.
It is possible to create a 3rd partition on the Micro SD card ('MMC') which can house the Slackware OS. However, this is not recommended due to the longevity of this type of storage - particularly if it has high I/O. Additionally it's been observed that the block device entry for the MMC card may alternate between 0 and 1 during boots, so your system may fail to boot. This is not by design though and should be addressed at some point.
Computing / Network Environment
| Item | Specification | Notes |
|---|---|---|
| Host Computer: an Internet-connected computer running an existing Linux distribution | Preferably a full installation of Slackware x86/64, but any distribution that can provide the required Python environment and HTTP server module. The Host Computer needs approximately 5GB free storage to download the required software assets. You must be able to obtain root access to this Host computer. | This will be used to download the Slackware distribution from the Internet, write the Slackware Installation media to the USB flash drive and Micro SD card. |
Hardware Setup
In this section we'll prepare the physical aspects of the Raspberry Pi4 to receive Slackware Linux.
Attach the base board
Attach the base board to the RPi4 using the brass spacers. Ensure that each brass spacer is screwed into the base board, as shown.

Screw four spacers to the top to secure the board to the platform

Attach the thermal tape to the CPU
Lay one of the pieces of thermal tape atop the CPU as shown:

Attach the heat sink brackets

Secure the board to the platform

Attach CPU fan power wires

RTC (Real Time Clock): Insert battery

RTC (Real Time Clock): Wiring


RTC (Real Time Clock): Attach to Raspberry Pi
![]()
![]()
Add all other peripherals required to install Slackware
- Connect the storage - ensure that it's connected to a blue USB 3.0 port
- Connect the Ethernet cable (optional - required if you want to set the date via NTP before commencing installation)
- Connect the HDMI cable
- Connect the USB keyboard and mouse


The basic hardware setup is complete.
Downloading the Slackware assets
In this section, we'll prepare the Linux Host Computer to receive and download the Slackware assets required for the installation.
1. Downloading the Slackware Linux AArch64 Distribution and Installation Assets
Open a shell on the Linux Host Computer.
Prepare a directory to hold and serve the Slackware Distribution
We'll download the Slackware Linux distribution into a directory named 'slackware'.
$ cd ## this returns to the root of your home directory
$ mkdir slackware
$ cd slackware
Determine where you are within the Host Computer's Filesystem
$ pwd
/home/mozes/slackware
Installing the Slackware ARM GPG key
The Slackware ARM GPG key will be used to verify the Bootware and Slackware Installation images.
$ curl -sSL https://www.slackware.com/infra/keys/arm/GPG-KEY | gpg --import -
Set the version of Slackware AArch64 to download
At the time of writing, the only version available is 'current'.
$ SLKVER=current
Set the distribution server
If you are using a mirror server rather than the master Slackware ARM server, set it here. The format is: <hostname>::<rsync module name>
$ SLKSRV=ftp.arm.slackware.com::slackwarearm
Download the Slackware Linux installer for the BCM2711 AArch64 platform
rsync -PavL $SLKSRV/platform/aarch64/bootware/installer/slackwareaarch64-${SLKVER}/bcm2711_rpi4.sdimg_latest.img.xz .
rsync -PavL $SLKSRV/platform/aarch64/bootware/installer/slackwareaarch64-${SLKVER}/bcm2711_rpi4.sdimg_latest.img.xz.asc .
The Slackware Installer images are approximately 300MBytes in size.
Download the Slackware tree verification tool
rsync -PavL $SLKSRV/platform/all/scripts .
Download the Slackware AArch64 tree
You will now download the Slackware distribution. This contains all of the software included within Slackware.
rsync \
   --exclude '*/source/*' \
   --delete -Prlvv \
   $SLKSRV/slackwareaarch64-${SLKVER} .
The Slackware distribution is approximately 4.5GBytes in size.
Verify the assets
Verify the digital signature of the verification tool:
gpg --verify-files scripts/slacksigchk.sh.asc
The output will be similar to this. You are looking for 'Good signature from Slackware ARM…'
gpg: assuming signed data in 'scripts/slacksigchk.sh'
gpg: Signature made Wed 24 Nov 2021 06:07:44 PM BST
gpg:                using RSA key F7ABB8691623FC33
gpg: Good signature from "Slackware ARM (Slackware ARM Linux Project) <mozes@slackware.com>" [unknown]
gpg: WARNING: This key is not certified with a trusted signature!
gpg:          There is no indication that the signature belongs to the owner.
Primary key fingerprint: 36D3 7609 2F12 9B6B 3D59  A517 F7AB B869 1623 FC33
Verify the Bootware and Slackware tree:
chmod 755 scripts/slacksigchk.sh
./scripts/slacksigchk.sh slackwareaarch64-${SLKVER}
Writing the Slackware assets to the Micro SD and USB stick
Elevate yourself to root
On your Host Computer, obtain root:
$ su - ## Note the hyphen - it's required
Write the Slackware Installer to the Micro SD card
Check what block devices are present
Prior to inserting the Micro SD Card into the USB adapter, we need to see what's already present within the OS so that we can easily locate our Micro SD card:
# lsblk -d
NAME MAJ:MIN RM   SIZE RO TYPE MOUNTPOINTS
sda    8:0    0 465.8G  0 disk
As you can see, this Host Computer there is a single storage device - sda.
Insert the Micro SD card into your USB Card Reader and connect the adapter to a free USB port on the Host Computer
Run lsblk again:
# lsblk -d
NAME   MAJ:MIN RM   SIZE RO TYPE MOUNTPOINTS
sda      8:0    0 465.8G  0 disk
sdc      8:32   1    58G  0 disk
sdd      8:48   1     0B  0 disk
As you can see, sdc is 58GBytes in size. This is the Micro SD card (in this example, it's labeled as '64GB' on the exterior of Micro SD card).
If your Micro SD card has existing partitions, you will not see them surfaced in this list - use lsblk -b to view them.
Write the Slackware Installer to the Micro SD card
Enter the directory into which the Slackware assets were downloaded previously:
# cd ~mozes/slackware ## Substitute with the path you noted earlier
# xzcat bcm2711_rpi4.sdimg_latest.img.xz > /dev/sdc ## Substitute/dev/sdc with the correct block device
# sync
Remove the MicroSD card from the Host Computer
You may now disconnect the USB adapter/remove the Micro SD card from the Host Computer.
Write the Slackware Installation Media to the USB stick
Now that the Micro SD card (and adapter) has been removed from your Linux Host Computer, we can begin setting up the USB stick to receive the Slackware Installation Media.
Insert the USB stick into the Linux Host Computer
Still as root, type lsblk -d
# lsblk -d
NAME MAJ:MIN RM   SIZE RO TYPE MOUNTPOINTS
sda    8:0    0 465.8G  0 disk
sdb    8:16   1  28.6G  0 disk
As you can see, the USB stick has appeared as sdb and is 28GB in size.
Create an ext4 file system on the USB stick
# mkfs.ext4 -FL SLKins /dev/sdb ## Substitute /dev/sdb with the appropriate one for your Host Computer
mke2fs 1.46.4 (18-Aug-2021)
[..]
Writing superblocks and filesystem accounting information: done
Mount the USB stick
# mount /dev/sdb /mnt/hd
Copy the Slackware Installation Media to the USB stick
# rsync -Pav slackwareaarch64-* /mnt/hd/
Umount the USB stick
# umount /mnt/hd
# sync
Logout from the root user
We no longer need to use the Host Computer, so you can logout of the root shell.
# logout
Installing Slackware
To proceed, you must have:
- Connected the storage to the Raspberry Pi 4
- Connected the HDMI monitor
- Connected the keyboard (and optionally, mouse)
- Optionally connected the Ethernet cable to set the date via NTP from the Internet
- Inserted the Micro SD card containing the Slackware Installer
Encrypted storage
If you'd like to encrypt your storage, check the Disk Encryption Guide.
Begin installation
Power on the Raspberry Pi 4
Apply power to the Raspberry Pi and after a few seconds, you will see the following on screen:

It takes several seconds to load and boot the installer, and it may take several seconds more for any further output to appear on the HDMI monitor. The process of obtaining an IP address via DHCP can also delay the ability to interact with the Installer.
Once an IP address has been obtained, you will be presented with a prompt. Press ENTER

Set the keymap


Set the date/time
Even if you have a battery pack for the RTC (Real Time Clock), the date on your system may be incorrect. We will sync the date from a highly-available NTP server:
ntpdate clock.akamai.com
hwclock -w

Setup disk partitions
For this installation a basic partitioning scheme will be created.
Partition
| Partition number | Device name | Size | Purpose |
|---|---|---|---|
| 1 | /dev/sda1 | 4GB | Swap |
| 2 | /dev/sda2 | Rest of storage | OS root ('/') partition |
Open fdisk against the /dev/sda block device. In this guide, /dev/sda will be your primary storage, and in this guide is the SSD connected to the USB adapter.
fdisk /dev/sda

Clear an existing partition table: Press 'o' to clear the partition table
![]()
Create the Swap partition:
Type 'n' for new partition:

Type 'p' for primary partition type:
Press ENTER for the 'First sector'
Type '+4G' for the 'Last Sector'/size:
Change the partition type to 'Swap'. Type 't' then hex code '82':

Create the partition for the root filesystem ('/'):
Type 'n' for new partition. Press ENTER to accept the defaults - this will create partition 2 as the maximum size available.

Type 'a' to mark the root partition (number 2) as bootable Type '2' to select partition 2.

Type 'p' to print to view the partition table.

Type 'w' to write the partition table:

fdisk will now exit.
Load the Setup menu

Setup Swap partition


Select and format the partition for the OS' root file system


Resize /boot partition to full extent
The Micro SD card that contains the /boot partition presently occupies approximately 1GB. Most MicroSD cards are several GBs in size. This option will resize the partition to its full capacity to avoid wasting storage. If you plan on manually adding partions to this later, you will want to choose 'No' here.


Boot Loader Configuration
The Installer will configure the Boot Loader and the OS' /etc/fstab automatically:


The rationale behind this divergence is that on x86 the root file system is typically on a storage bus (SCSI, SATA, ATA), where the physical configuration (which port the storage is connected to) of the storage rarely changes. This can be the case on ARM, but it's generally to a lesser extent and the root file system may be connected to a hot-plug bus such as USB. This lends itself to the risk of device re-ordering across boot cycles (e.g. /dev/sda becomes /dev/sdb), causing boot failure.
Please be aware that the Slackware Installer only labels the swap and root file system. Therefore you are advised to manually label the file systems and modify the OS /etc/fstab accordingly. If you have only a single storage device and don't plan on adding more, you can use the settings that the Slackware Installer configures.
Select Source Media
- Insert the USB stick into one of the blue USB3 ports of the Raspberry Pi.

Pick option '2 - Install from a Slackware USB stick'


Package Series Selection
You can now choose the package sets to install. The recommendation is to install everything. A full Slackware installation will occupy approximately 15GB.

Pick the 'terse' option:

The packages will begin installing:

Configure the Console Settings
If you plan on using the UART/'Serial' console, you should select 'No' here. If you plan on exclusively using an HDMI monitor, you should pick 'Yes'.

Remove the Slackware Installer from the SD card
The Micro SD card is transformed from being the Slackware Installer into the Slackware OS's /boot partition. At this stage, if the installation has worked for you (at certain points in the Slackware installer you are past the point of no return) you can delete the Installer. However, if something has gone wrong you can reset the Raspberry Pi and reboot the installer without having to re-deploy the Slackware Installer image from your Linux Host Computer.
Generally you should say 'Yes' here.

Post Installation Configuration
The Slackware Installer will walk you through the standard Slackware setup. The on-screen instructions will suffice.


Select a Console Font
It's recommended for the Raspberry Pi that a larger console font is configured for the virtual console.


The recommended font is 'ter-732b.psf'. This is the font used within the Installer.

Continue Post Installation Configuration


Configure GUI Window Manager
This author recommends using XFCE as it's light weight versus KDE.

Continue Post Installation Configuration


Slackware Setup Complete


Disconnect the USB stick

You must now physically remove the USB stick that contains the Slackware Installation Media.
Reboot into the Slackware OS

Generally you'll want to reboot into the OS.
However, if you are planning on setting up RAID or need to customise the Operating System Initial RAM Disk, you should select 'Shell'.
The Slackware OS will be found within '/mnt'. You can use the 'os-initrd-mgr' tool (Video tutorial).
Booting the Slackware OS

Login to the Slackware OS

You may now login as 'root', using the password you set within the installer.
Post Installation Configuration
There are a few post-installation configuration tasks to complete.
Initial Time/Date Sync
If Internet access is available to the Raspberry Pi, prior to proceeding with any further setup, you may wish to set the time now as a one-off event:
Elevate yourself to root and use ntpdate:
$ su -
# ntpdate rolex.ripe.net  # or pick your favourite NTP server
# hwclock -w # writes the date to the RTC
# logout
Add a plebeian user
You should add a plebeian (non-root) user using the 'adduser' tool.
This is documented here.
NTP (Network Time Protocol) setup
Even if your Raspberry Pi has an RTC (as documented in this guide), you may wish to configure it to set time from an Internet NTP Server. The Raspberry Pi requires continuous Internet access for this to function.
Use a graphical login manager
If you prefer to use a graphical login manager, you can configure the default runlevel as 4:
su -
sed -i 's?id:3:?id:4:?g' /etc/inittab
reboot
Managing Slackware on the Raspberry Pi
Keeping the Slackware OS up to date
One of the preferred tools to keep your system up to date is slackpkg.
Loading Additional Linux Kernel Modules at Boot Time
There are a number of peripherals that may require Kernel modules loading early on in the boot sequence. An example of this would be RTCs (Real Time Clocks).
To load Kernel modules during the early boot sequence, read:
/boot/local/README.txt
As root, the easiest way is to create
mv /boot/local/load_kernel_modules.post.sample /boot/local/load_kernel_modules.post
Then add the appropriate module loading commands to: /boot/local/load_kernel_modules.post You can also add shell code here to initialise a peripheral - writing something to the peripheral's Kernel interface, for example.
Managing the Raspberry Pi Firmware
The Raspberry Pi firmware is managed by the Slackware packages. Simply upgrading to the latest available Slackware packages will keep your system up to date with the packages that have been tested by the Slackware community.
Bootware
The Raspberry Pi boots from a FAT partition on the Micro SD card. This partition contains the closed-source proprietary boot loader, firmware and various other assets it requires. It is mounted within the Slackware OS under /boot/platform/hwm_bw.
These assets are provided and managed by the Slackware package 'a/hwm-bw-raspberrypi'.
Raspberry Pi SoC/IP Core Firmware
The firmware for the peripherals on the Raspberry Pi Hardware Models is contained within the Slackware 'a/kernel-firmware' package.
Using Device Tree Overlays
Device Tree Overlays can be configured within the Raspberry Pi's Native Boot Loader configuration file: /boot/platform/hwm_bw/config.txt
Using the Serial/UART adapter
This documentation discusses using the Raspberry Pi without the UART/Serial console.
If you'd like to use one, there are two that have been tested.
USB Serial Device converter: Prolific Technology Inc / PL2303
This image below shows the PL2302 (the Serial adapter listed in the Hardware table at the head of this document) connected to the Raspberry Pi:

USB Serial Device converter: FTDI / FT232RL
This is the model shown here.

Using the USB Serial Device converter on the Linux Host Computer
Once wired up, connect the USB end of the adapter into your Linux Host Computer, and use the following command.
screen -T screen-256color /dev/ttyUSB0 115200
Known Limitations / Bugs
| Issue | Work around | Notes |
|---|---|---|
| Poor X11 performance | None presently | Bug reportPresently the required drivers ('VC4') is not in the mainline Linux Kernel. Will keep track upstream. |
Contributing to the Slackware ARM project
There are a plethora of ARM devices on the market which requires initial R&D and continuous testing. If you'd like to help Slackware support more ARM boards, please check out the documentation explaining how to get involved.
Supporting / Sponsoring the Slackware ARM project
Maintenance of the Slackware ARM port takes not only a lot of time, but also has financial costs such as the on-going use of electricity, Internet hosting and purchasing and maintenance of ARM hardware.
Once you find yourself enjoying using the ARM port of Slackware, please take a few moments to show your appreciation through sponsorship.