目錄表
Slackware ARM project web site | Forum | Slackware ARM development documentation | Slackware ARM installation guides
Hardware Setup guide for the Raspberry Pi 4
| Hardware Model | Raspberry Pi 4 |
| Document Version | 1.00,Feb 2022 |
| Author | Stuart Winter <mozes@slackware> |
Supporting the Slackware ARM Project
If you like what we're doing here, please consider becoming a patron.
Video Tutorial
This tutorial is also available in video form.
Installation Guide
This hardware setup guide is the companion to the Raspberry PI 4 installation guides.
Hardware
| Item | Specification/Type | Required? | Notes | |
|---|---|---|---|---|
| Raspberry Pi 4 Model B | 4GB and 8GB RAM models have been tested | Yes | This is the bare board | |
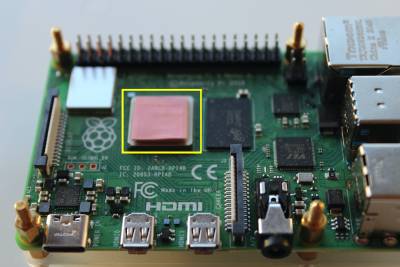
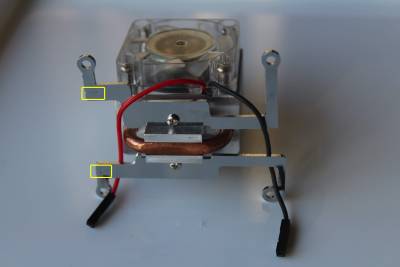
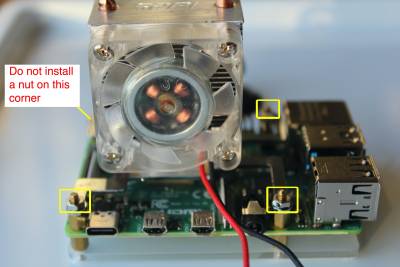
| 'Ice Tower' CPU heat sink & cooling fan | A heat sink or CPU is required | This has been recommended as a suitable fan for high-CPU workloads. | ||
| Power supply | Official Raspberry Pi PSU | Yes | It's best to use the official PSU as others can cause instability over time. | |
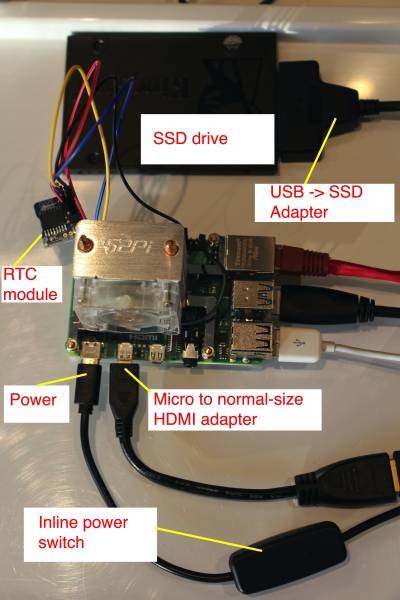
| Inline power switch | - | Optional but recommended | The Raspberry Pi 4 does not have reset nor power buttons on the board. Reports from the Slackware community suggest that the power socket on the Rpi will become damaged over time from wear. This inline power switch prevents damage to the RPi. | |
| Micro to full-size HDMI adapter | - | Optional | Depends on your local setup and whether you wish to connect an HDMI monitor to the RPi. | |
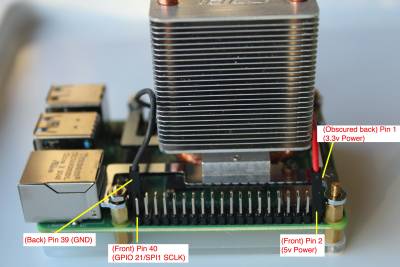
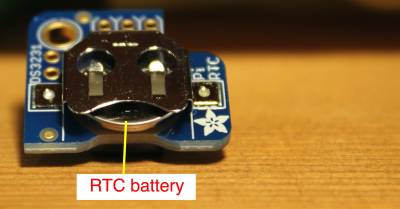
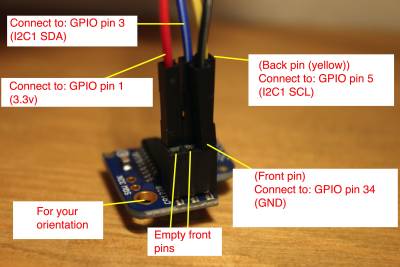
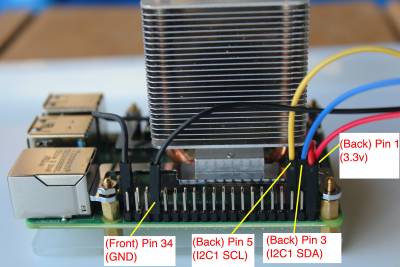
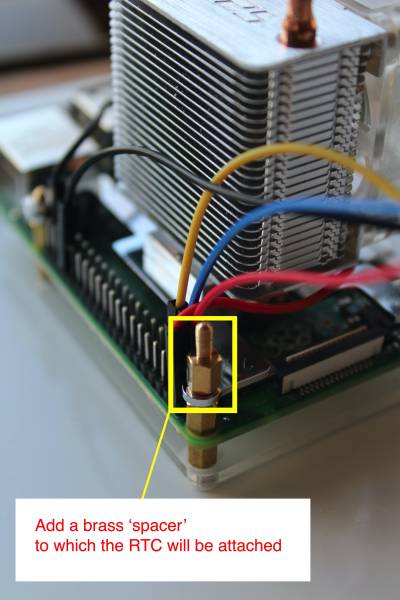
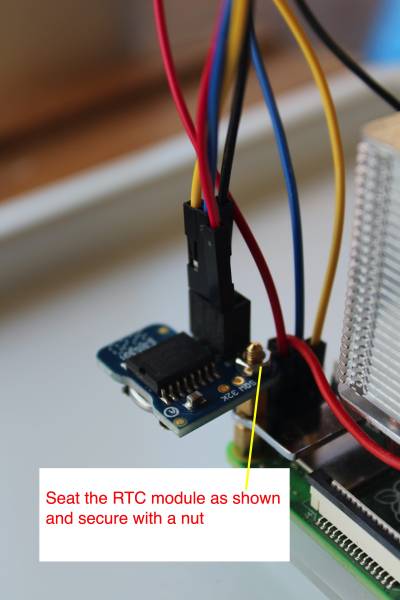
| Real Time Clock (RTC) | Adafruit PiRTC - Precise DS3231 | Optional | This RTC been recommended by the Slackware community. | |
| Battery for RTC | Lithium 3volt CR1220 | Optional | Depends on whether you use the RTC module. This enables the RTC to maintain the time whilst the RPi is powered down. | |
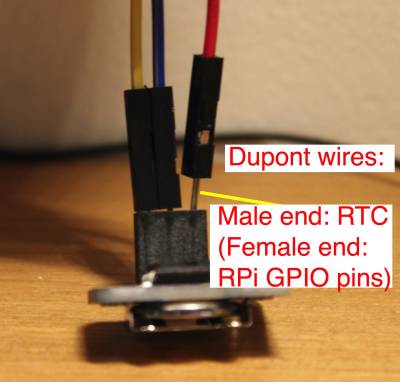
| Dupont wires | Female to male | Optional | This is to wire in the RTC module, as the large sized CPU heat sink prevents the RTC module from connecting directly to the GPIO. These wires are also useful for connecting other peripherals to the RPi's GPIO. | |
| SATA storage / SSD | Minimum useful size: 30GB | Required | Will contain the Operating System. You can install to other storage, but this documentation covers this particular configuration only. The Kingston-SA400S37-240G has thoroughly proved itself in the Slackware ARM build infrastructure - most build machines use these, but any SSD or spinning hard disk should work | |
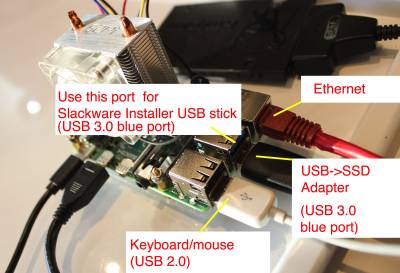
| USB to SATA adapter | - | Required | Many models will work, but this one has been tested on many of this author's ARM hardware. | |
| USB to Serial adapter | PL2303 chip. Other models may work, but this one has been tested. If your model has the option to set voltages, ensure 3volts is set! | Optional | A USB to Serial/UART adapter is recommended if you want to access the console remotely, but is unnecessary if you only plan on using an HDMI monitor. This document covers installing using an HDMI monitor - you can find information about connecting the Serial/UART adapter at the foot of this document | |
| Micro SD Card | 16GB minimum capacity, Class 10 (fast speed) | Required | Initially used to boot the Slackware Installer, and subsequently transformed into Slackware's /boot partition. | |
| USB keyboard and mouse | Standard peripherals | Required | A USB keyboard and mouse are required for this Slackware installation guide but are not required for the running of the OS. Slackware can also be installed headless (without a keyboard or monitor) over the Serial/UART or SSH (but this isn't documented). |
Recommended/ tested SD cards and other storage peripherals
In addition to the examples of tested hardware, here follows other storage devices and peripherals that have been tested by the Slackware community.
| Type | Details |
|---|---|
| Micro SD card | Gigastone 32GB |
| Micro SD card | Kingston 64GB microSDHC Canvas Select Plus |
| Micro SD card | Kingston SDCG3 |
| Micro SD card | SanDisk 16GB |
| USB to SATA adapter (alternative to the one in the table above) | SKL Tech |
Alternatives to SSD
If you prefer to use NVME storage, these have been tested:
| NVME Storage Module | Kingston A2000 SSD 250G & 500GB models |
| USB to NVME M.2 adapter & enclosure | LEMORELE M.2 NVMe SSD Enclosure USB C External PCIe B+M/M-Key SSD Caddy 10Gbp UASP USB 3.1 Gen 2 M2 |
Notes on storage setup
The setup documented here (2.5“ SSD connected to a USB-to-Serial adapter for power and data) has proven stable for this author.
Hardware Setup
In this section we'll prepare the physical aspects of the Raspberry Pi4 to receive Slackware Linux.
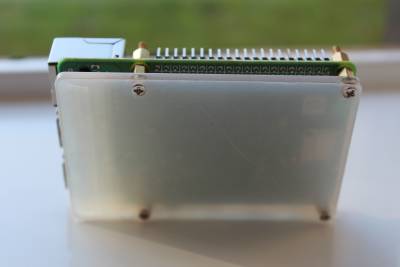
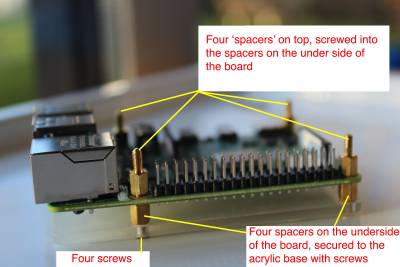
Attach the base board
Attach the base board to the RPi4 using the brass spacers. Ensure that each brass spacer is screwed into the base board, as shown.
